
Free Crochet Pattern
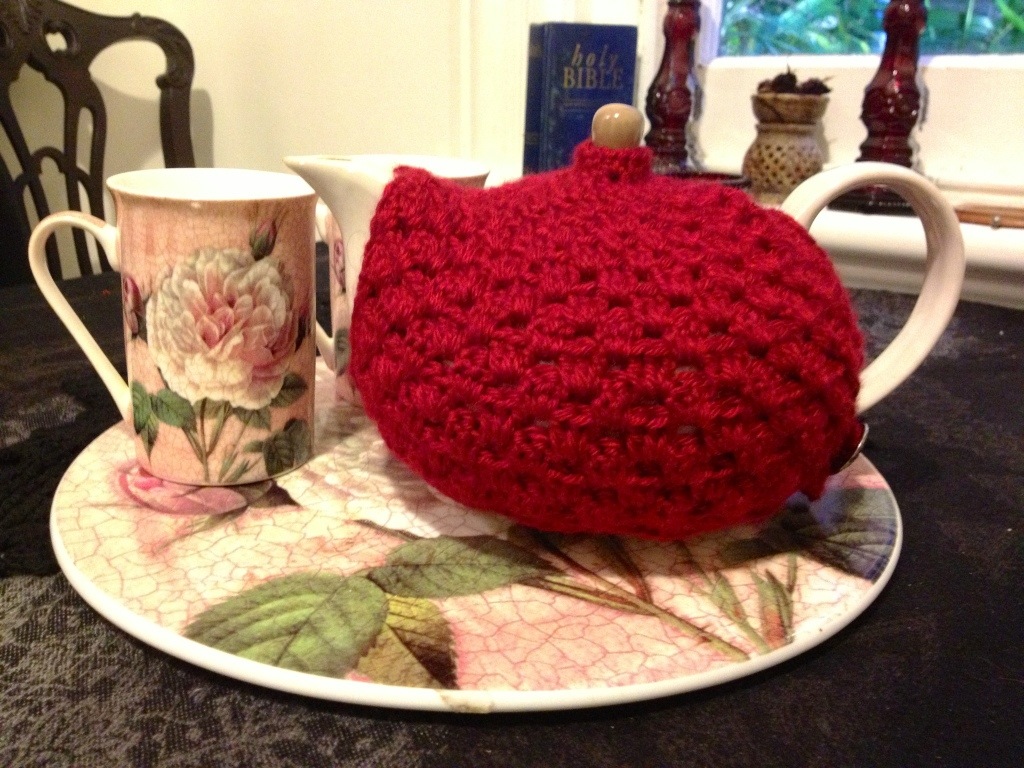
This delightful little project is quick and simple to make, the whole process only took me one evening and a single ball of yarn. A tea cosy is a quaint addition to any kitchen and an essential item for brewing the perfect pot of tea! Get creative with feature buttons or try alternating colours on each row for extra fun!
The Little Red Tea Cosy is also available for purchase ready-made on my etsy store!
Instructions
 I used 8 ply wool and a 4mm crochet hook. I have written the pattern in British crochet terminology. Comment with any questions 🙂
- Chain 72. Turn.
- DC in second chain from hook, and DC to the end of the row. Turn.
- Chain 3, skip the first two DC and make 3 T into the third DC. *Skip 2 DC, 3 T into next DC* repeat *-* to the end of the row. 1 T into last DC on row. Fasten off.
- Find the middle of your work by folding the piece in half. Attach your yarn in the space between 3 T clusters to one side of the centre point. Chain 3 (=1T) 2 T into first space, then 3 T into each space to end of row, and 1 T into end. NOTE: 3 T at beginning of rows and 1T at end of rows makes the piece go up straight, without increasing or decreasing.
- Continue to crochet like this, with 3 T at the beginning of rows and 1 T at the end, for 5 more rows. You should now have 7 rows in total, measure on your teapot to make sure this reaches the top of your spout. Adjust number of rows if necessary. Fasten off.
- Attach the yarn to the other side of the centre point and repeat steps 4-5.
- Now that you have reached the top of your spout, it is time to join the two sides to make a circle. Attach the yarn to the beginning of your row in a space between 3 T clusters. Chain 3, 2 T in same space, and 3 T in each space to the gap for the spout. Make 2 T into the edge space, and 2 T in the edge space on the other side. Continue with 3 T in each space to the end and join with a SS into the the 3rd chain of the beginning 3 chain.
- Now we begin to decrease for the top of the teapot. My measurements are for my teapot, which has quite a wide round shape. If you have a very tall teapot, you will need to adjust the rows so that you are not decreasing too quickly. Just keep measuring on your teapot and it will be fairly clear where you need to start tightening up. Chain 3, 2 T in first space, and 3 T in each space around. SKIP the spaces where you joined the spout and handle edge, leaving them empty so that they are drawn in nice and snugly. Join with SS to beginning chain as before.
- Chain 3, 2 T in same space, *2 T in next space, 2 T in next space, 3 T in next space*. Repeat *-* to end of row and join with SS.
- Chain 3, 1 T in same space, 2 T in each space around. Join with SS.
- Chain 3, 2 T in same space, *skip next space, 3 T in next space*. Repeat *-* to end of row and join with SS.
- Chain 3, 1 T in same space, 2 T in each space around. Join with SS.
- Now we are going to decrease for the very top of the teapot. Chain 2, 1 HT in each stitch to end of round and join with SS.
- Chain 2, *skip 1 stitch, 1 HT in next stitch* repeat *-* around and join with SS.
- Now we are going to shape a little turtle neck around the knob at the top. Chain 2, *2 HT into 1st stitch, 1 HT into next stitch* repeat *-* around and join with SS. Fasten off.
- Crochet SC around the slits for the handle and spout to finish them off neatly.
- Now we are going to create a scalloped edge around the bottom. Attach the yarn to the bottom edge of your tea cosy. *Skip 2 stitches, 5 T in next stitch, skip 2 stitches, SC in next stitch* repeat *-* to end. Now we are going to make a button hole, adjust chain to fit around your button. SC around the corner at the end to reach the edge of the 3 T cluster. Chain 12, attach with a SC to the next stitch, turn, make 12 SC in the 12 chain loop and end with SC in beginning stitch.
- Attach your button to the other side, and you’re done! Time for a cuppa, I think 😉
For extra photographs of the finished product, have a look at the item on my Etsy store!

I love that red tea cosy x
Thanks! It’s a sweet little thing 🙂
adorable = do you have a pattern you can share?
Hi! I have written the pattern instructions out in steps. I will have a go at writing up a chart for it also, hopefully I will be successful and be able to publish shortly! 🙂
Thanks Sue, looking forward to seeing it 🙂
Great idea & very cute Trin, I’ll have to show you my new popcorn stitch teacosy – next time you’re over. xox